In this chapter we will guide you through the process of adding new functionality, mounting of the appliance and connecting it to the network and power supply.
First, we will explain how to expand the appliance's functionality in the subchapter "Installing PCI cards," where details about adding cards will be presented. In the chapter ''OfficeBOX mounting'' we will explain where and how an officeBOX appliance can be mounted.
Software setup is described in another document which is also available from the website.
Although officeBOX is a fully functional communication appliance, new functionality can be added by installing various PCI cards. You can add PSTN, ISDN or E1/T1 functionality of your choice, and with an enclosed PCI riser it is possible to add two cards into officeBOX.
|
A list of supported devices is available on Bicom Systems website: http://downloads.bicomsystems.com/pbxware_finder/pbxware-finder-1.0.exe |
The procedure of installing new cards is simple and we will take you through it step by step.
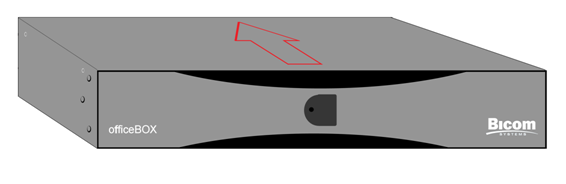
Remove the top cover by removing three screws, one on the right side and two on the left side. Then, by placing four fingers of both hands on the cover and using thumbs to push the front of the appliance, pull the cover slightly towards yourself as in Figure 12. Once the cover is released from its locks, you can take it off.
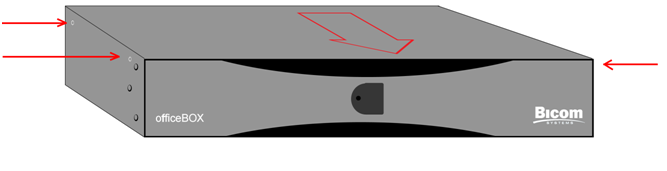
Figure 3. Placement of the screws and removal of top cover
When you have opened the appliance, remove the two screws indicated from the PCI riser, then pull it slightly out of the motherboard.
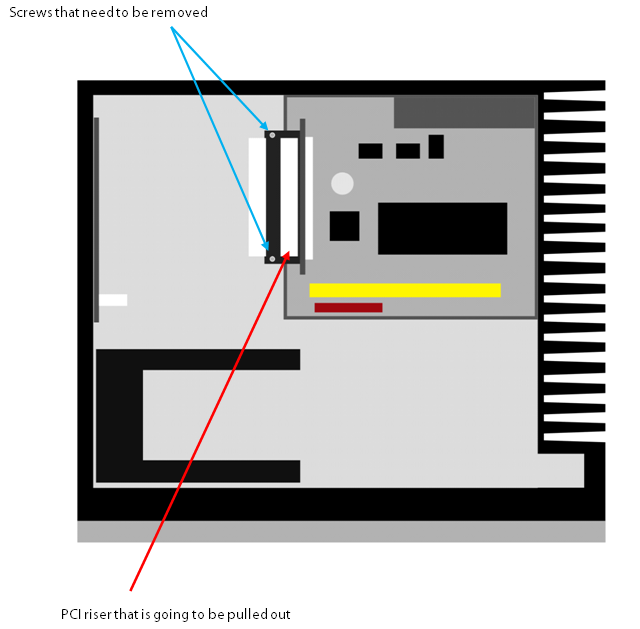
Figure 4. Opened officeBOX
|
When you take the PCI riser out, be sure not to lose two plastic little tubes that are used as a spans between the two PCI slots on the riser. The screws that hold the riser inside the appliance go through the plastic tubes, so they are important when re-inserting the riser. |
Remove the screws from the PCI card mounting from the back of the appliance and take it out.
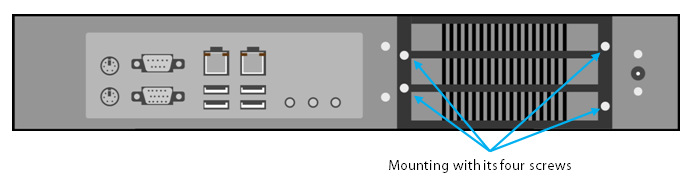
Figure 5. Rear view of officeBOX
When PCI card mounting is out, remove the metal slot cover from slot 1 or 2, depending upon the card placement on the PCI riser.
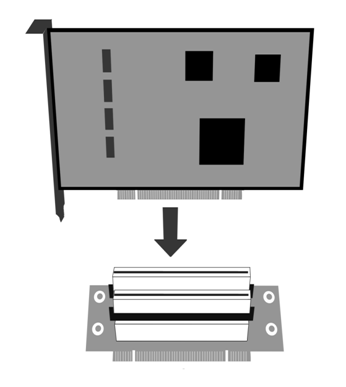
Figure 6. Inserting a card
Insert desired card into the PCI riser. Attach the PCI card mounting to the card which is inserted into the PCI riser, using the screw which was holding the cover on the mounting.
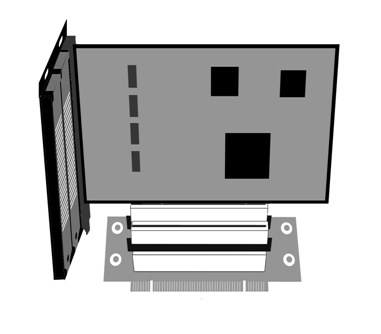
Figure 7. Everything put together
When the PCI card mounting is attached to a card in the PCI riser, put the spans back between the PCI slots, and insert the screws that attach it to the appliance through the holes as shown in Figure 8. (card and mounting are omited for simplicity).
Figure 8. is showing top view of the PCI riser which means that the screws which hold it, must be placed from the top, so they can attach everything properly to the appliance.

Figure 8. Putting spans between PCI slots first, then screwing through it.
Now that everything is assembled, it is time to put it all back into officeBOX. Push lightly the PCI riser back into its place and use the screws previously adjusted, to attach it to the appliance.
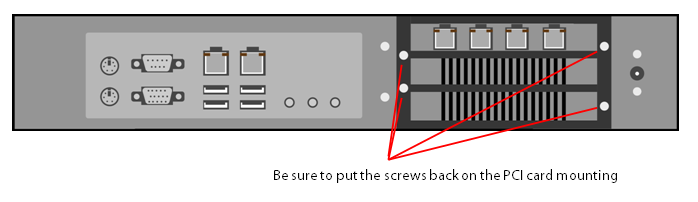
Figure 9. Rear view with card placed inside the appliance
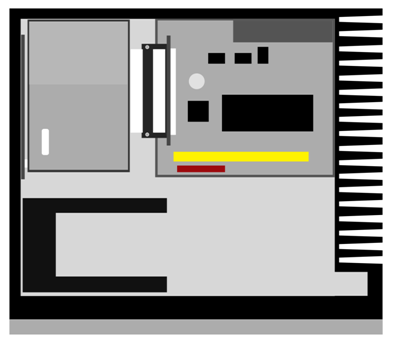
Figure 10. Top view of the appliance with everything assembled
When everything is in the appliance, take the top cover, and put it back on in the reverse order from which it was taken off.
Place the top cover back on the officeBOX, but not directly on the top, just a little forward so you can interlock it with the appliance. Now, push the cover until the holes on it match with the ones on appliance, so you can put back the screws.
OfficeBOX appliance can be mounted on desk, floor, wall or into the rack cabinet.
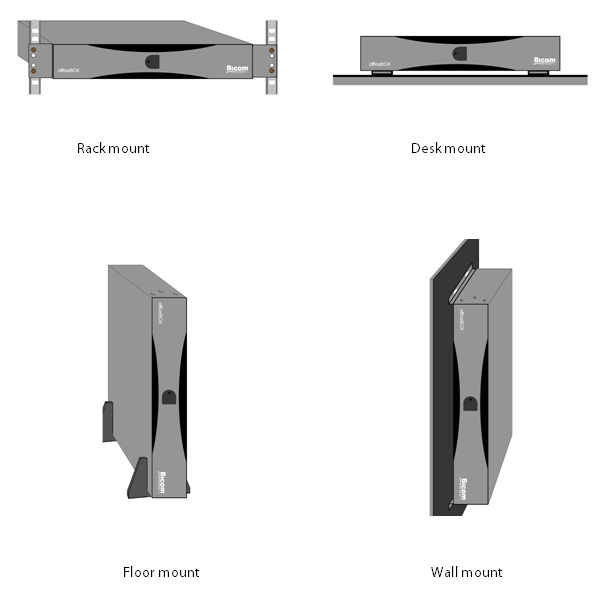
Figure 11. Mounting options
The four rubber feet that came attached to the appliance by default are there if you want to put the appliance on desk.
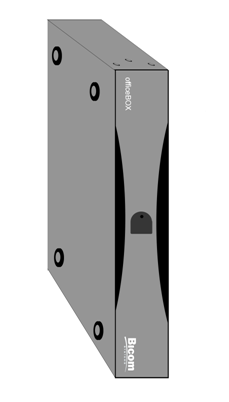
Figure 12. officeBOX with rubber feet
When the appliance is on the desk, make sure that the surface is flat, that you provide good ventillation for your appliance and keep it away from any heat sources.
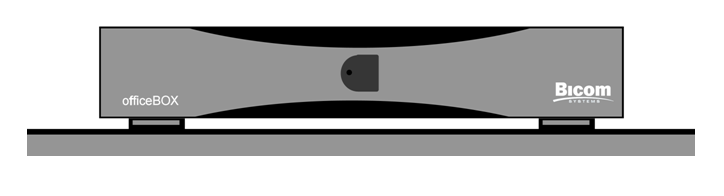
Figure 13. officeBOX with rubber feet mounted on the desk
The four rubber feet that come attached to the appliance by default, need to be removed prior to floor mounting.
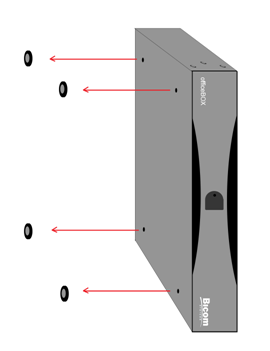
Figure 14. officeBOX without rubber feet
When mounting officeBOX appliance on the floor, you will need two special brackets which will let you mount your officeBOX vertically on the floor.
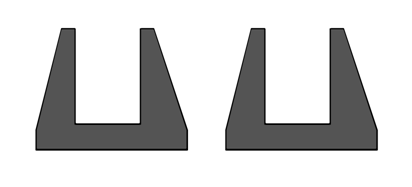
Figure 15. Brackets for vertical floor mounting
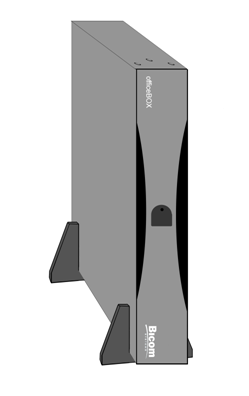
Figure 16. officeBOX with brackets for vertical floor mounting
Suggested method mentioned for desk mounting, also applies for floor mounting.
If you plan to mount the appliance inside a rack cabinet be sure to remove the three plastic caps that reside on both sides of the appliance. Then attach the rack mounts with three screws that are inserted in place of those caps.
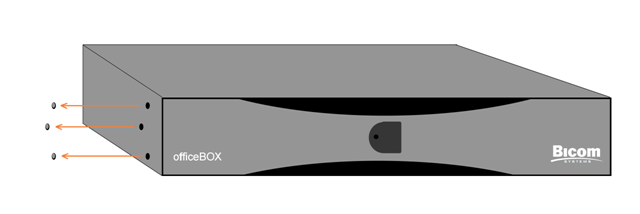
Figure 17. officeBOX without three plastic caps
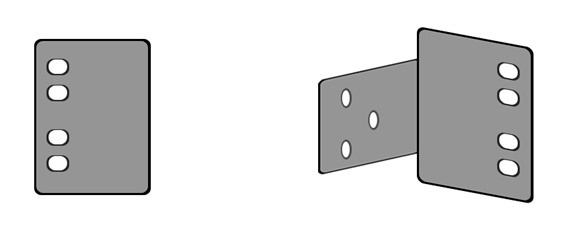
Figure 18. Rack mounts: Front and Side view
Next is to attach the officeBOX to the rack cabinet. This is done by using two larger screws, that are also provided with the rack mounts, and attaching the appliance using two of the four larger holes on the rack mounts which can be seen on Figure 18 ‐ Front view.
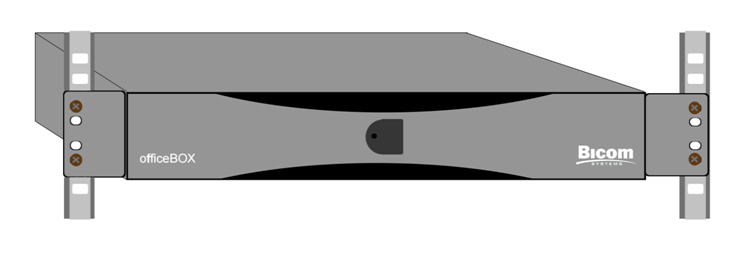
Figure 19. officeBOX mounted in a rack cabinet
|
When mounting officeBOX inside a rack cabinet, be sure to follow all the instructions specified under Important Safeguards. If you plan to install additional cards, it is very important to put the top cover back on the appliance, before you mount it inside a rack. |
The four rubber feet that come attached to the appliance need to be removed in order to attach the wall mount.
Figure 20. officeBOX without rubber feet
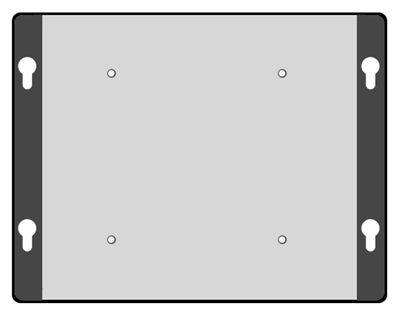
Figure 21. Wall mount
After the rubber feet are removed, attach the wall mount to the machine using the four screws provided. On Figure 21. you will see four smaller holes which are designed for attaching the wall mount to appliance.
The four larger holes on the sides are meant for attaching the appliance to the wall. Before attaching the appliance to the wall, you must drill four holes with dimensions between them corresponding to the wall mounts holes. After drilling, insert wall plugs inside the holes and then use screws to attach the appliance.
The equipment (wall plugs and screws) shiped with the wall mount are:
-
4x No.8 x 1.5 Black pozi screws
-
4x Wall Plug
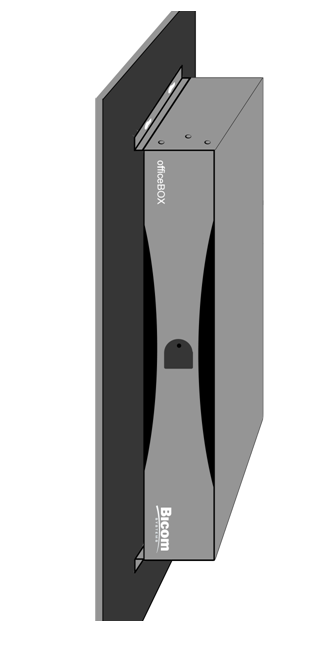
Figure 22. officeBOX mounted on a wall
Connect the appliance to the network by plugging one end of the Cat 5 ethernet cable to the LAN connector on officeBOX. Plug the other end of the cable to an existing network socket. WAN connector currently is not supported, but is available for custom modifications.
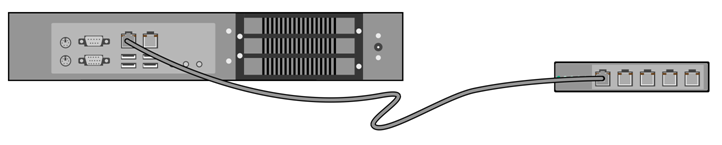
Figure 23. Connecting officeBOX to an example switcher
Connect the power cord to the power outlet (110-240 V; 50-60Hz), and the other end to the power adapter. The cable from the power adapter then goes to the officeBOX power supply connector.
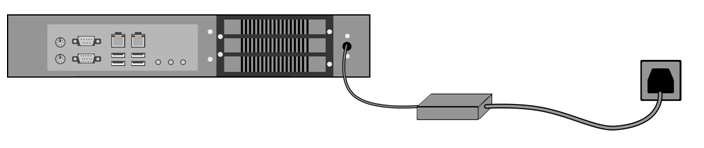
Figure 24. Connecting officeBOX to electric power
After you have connected the appliance to the electricity you can turn it on by pressing the On/Off button which can be seen on Figure 1. Also, if you press the On/Off button when the appliance is working it will shut down immediately.