Installation of the officeBOX appliance takes place in three steps:
-
Installation, explains the mounting process and physical connection to the network and to a power source.
-
Adding new functionality by installing various cards.
-
Software Setup, explains the process of setting up the appliance in a network environment using the web-based Setup Wizard
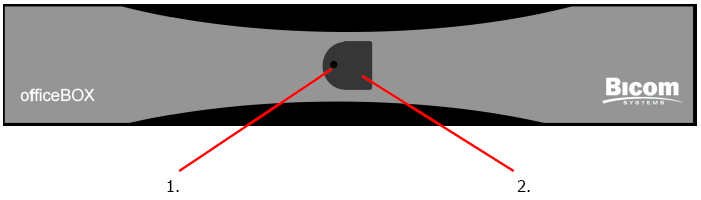
Figure 1. Front view of the officeBOX appliance.
-
Hard Disk activity LED
-
On/Off Button
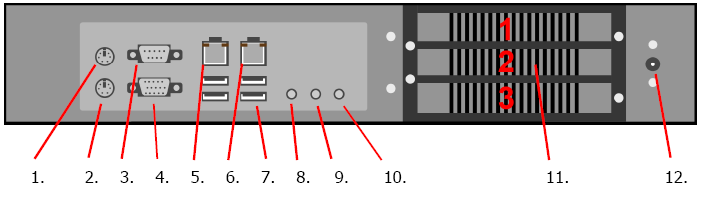
Figure 2. Rear view of the officeBOX appliance.
-
PS/2 connector for connecting a mouse
-
PS/2 connector for connecting a keyboard
-
Serial connector
-
VGA for connecting a monitor if needed
-
Ethernet connector for LAN network integration
-
Ethernet connector for WAN network integration
-
Four USB connectors for additional USB devices
-
Line Out jack
-
Line In jack
-
Microphone jack
-
Three PCI mounting places of which you use first and second.
-
Power Supply connector