This step by step guide will help you install PBXware on the appliance. To complete it, you need to have a Windows PC and a USB memory stick. Also, you must connect a monitor and a keyboard to the appliance.
-
Step 1. Download PBXware image from http://downloads.bicomsystems.com/officebox/pbxware.img
-
Step 2. Download COMMsware Image Writer from http://downloads.bicomsystems.com/cw/
-
Step 3. Install the COMMsware Image Writer
-
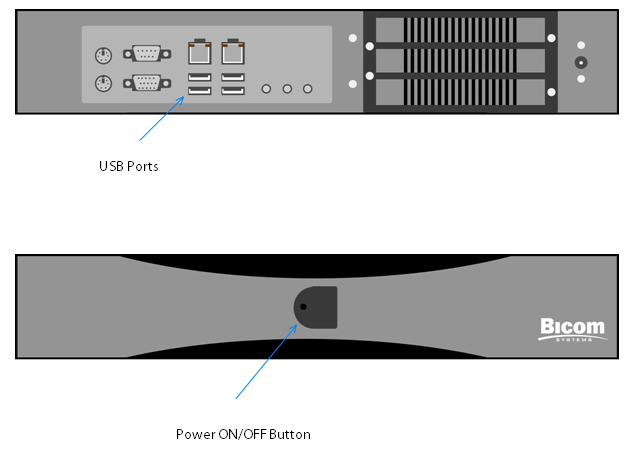
Step 4. Insert your USB stick in your PC
-
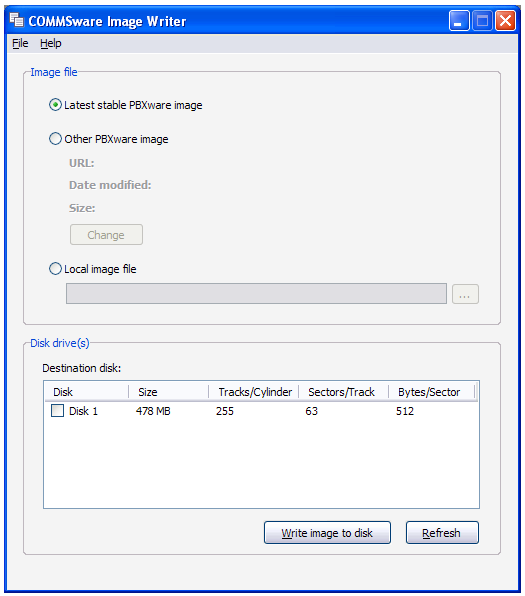
Step 5. Run the COMMsware Image Writer and you will get following
-
Step 6. Select Local image file option button and choose the image you downloaded earlier. Click the checkbox by your USB stick and click on the Write image to disk button
-
Step 7. This operation might take some time to finish, but when it's done you will be ready to continue installing PBXware onto the appliance
|
Since downloaded image is 1 GB in size, your USB stick must also be 1 GB or larger |
Now that the USB preparation is done you are ready to continue with the steps.
-
Step 8. Insert the stick in appliance and turn it on
-
Step 9. When the appliance starts booting press DEL button on your keyboard to enter BIOS
-
Step 10. In BIOS go to Advanced BIOS Features and under First Boot Device choose USB-ZIP. For Second Boot Device choose Hard Disk. Go to Save & Exit on previous screen. Appliance will now boot from USB
-
Step 11. When the booting is finished enter root for login and pbxware for password
-
Step 12. Enter dd if=/dev/sda of=/dev/hda to transfer PBXware to the appliance
-
Step 13. When dd is finished, you must reboot appliance by issuing reboot command
-
Step 14. When appliance starts booting take out the USB stick so the appliance boots from the Hard Drive. If the bootup procedure went without any problems, system is ready for Setup Wizard and licensing by the end user.
|
If for some reason step 12 didn't finish properly, you should find out how the system sees USB stick and Hard Drive. That is done by issuing the cat /proc/partitions command. Disk is usually recognised as /dev/hda and USB stick as /dev/sda, but if they are recognised differently, put those in the step 12 acordingly. |